This document outlines the steps needed to integrate Team GPS with Azure Active Directory. Once configured, Azure AD will automatically provision and de-provision users and groups in Team GPS.
Capabilities:
- Create users in Team GPS
- Remove users in Team GPS when they no longer require access
- Keep user attributes synchronized between Azure AD and Team GPS
Prerequisites:
- Azure AD Tenant
- Team GPS Tenant
- A user account in Team GPS with Admin permissions
Step 1. Configure Team GPS to support user provisioning with Azure AD. Generate Secret Token in Team GPS
- Sign in to a Team GPS account with Admin or Integration Admin permissions
- Navigate to Admin Settings > Integrations > Auto Provisioning and enable the integration
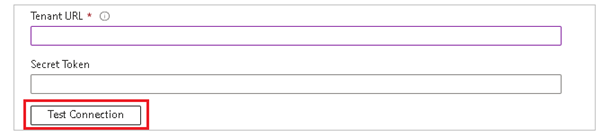
- Once enabled you should see both the Tenant URL and a Secret Token that can be generated

Note: The Secret Token will disappear when navigating away from this screen. Please make note of it before leaving the page.

If you missed it, retrieve the information by navigating to Integrations > Auto-Provisioning, and then click on the Azure ID Icon to obtain the Secret Token.
Step 2.
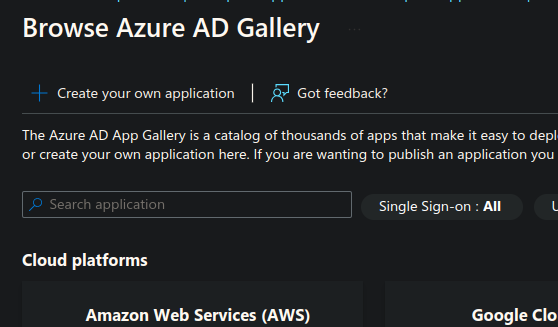
- Add Team GPS from the Azure AD Tenant
- Add Team GPS from the Azure AD Application Gallery.
Step 3.
- Define who will be in scope for provisioning
- The Azure AD provisioning service allows you to scope who will be provisioned based on assignment to the application and/or based on attributes of the group.
Step 4. Configure automatic user provisioning to Team GPS
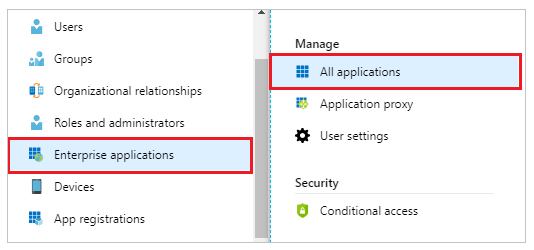
- Sign in to the Azure AD portal. Select Enterprise applications, then select All applications.
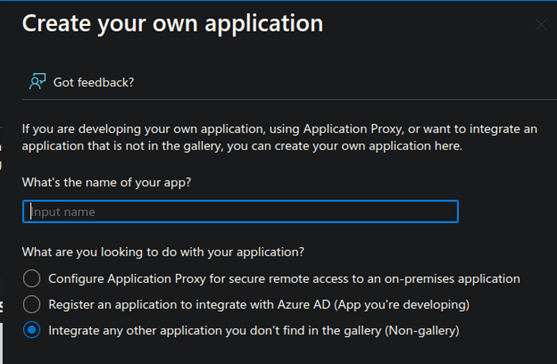
- In the applications list, select New application

- Select Create your own application
- Name this app and select "Integrate any other application you don't find in the gallery (Non-gallery)"
- Navigate back to the enterprise applications page and select the app you just created
- Navigate to provisioning tab and click on Get Started
- Set the Provisioning Mode to Automatic

- In the Admin Credentials section, input your Team GPS Tenant URL and Secret Token provided by Team GPS (Take reference from Step 1 above). Click Test Connection to ensure Azure AD can connect to Team GPS. If the connection fails, contact Team GPS (support@team-gps.net) to check your account setup.
- In the Notification Email field, enter the email address of the person or group who should receive any provisioning error notifications and select the Send an email notification when a failure occurs option.

- Select Save
- In the Provisioning page, Mappings section, select Provision Azure Active Directory Groups and switch Enabled to "Yes". Under Provision Azure Active Directory Users ensure Enabled is switched to "Yes"

- Click on Provision Azure Active Directory Users.
- At the bottom of the page, select "Show advanced options" and click on review your schema here
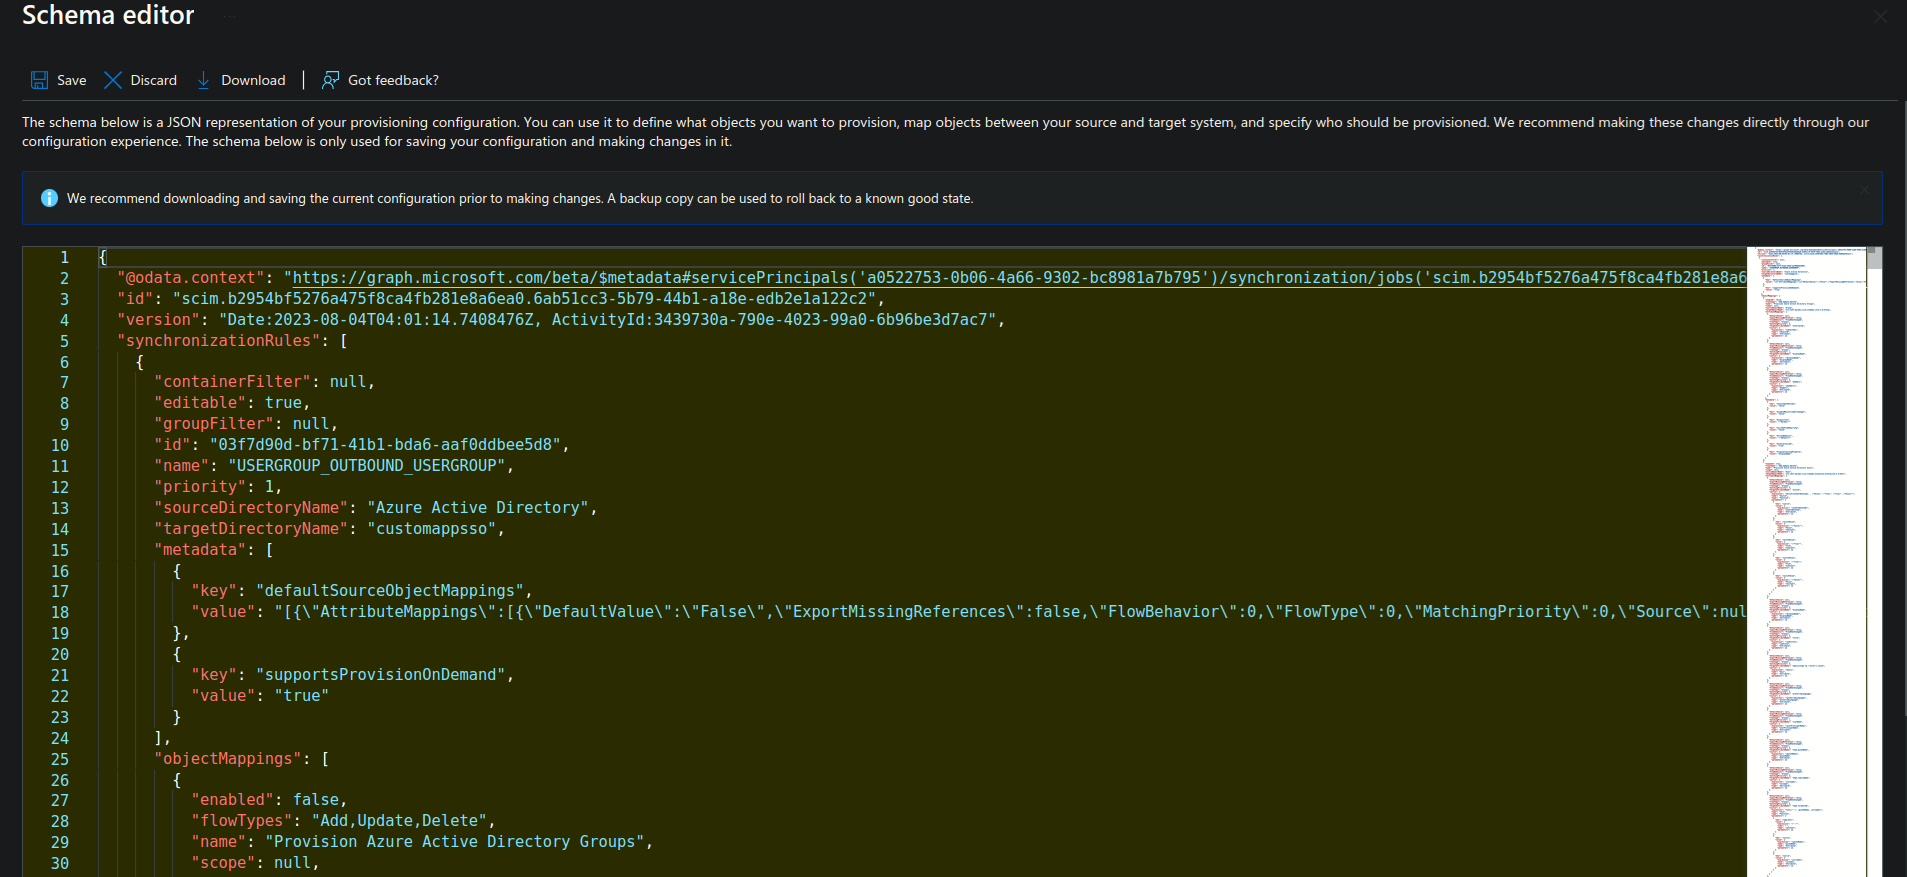
- A schema editor will open, remove the existing json representation of the attributes and paste in the new json provided by Team GPS. This will change the attributes to only fields supported by Team GPS. Then click Save.
Scheme file can be downloaded and copied below.
Note: It is always recommended to take a backup of your schema before making any changes.
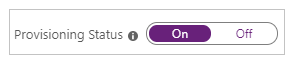
- To enable the Azure AD provisioning service for Team GPS, change the Provisioning Status to On in the Settings section.
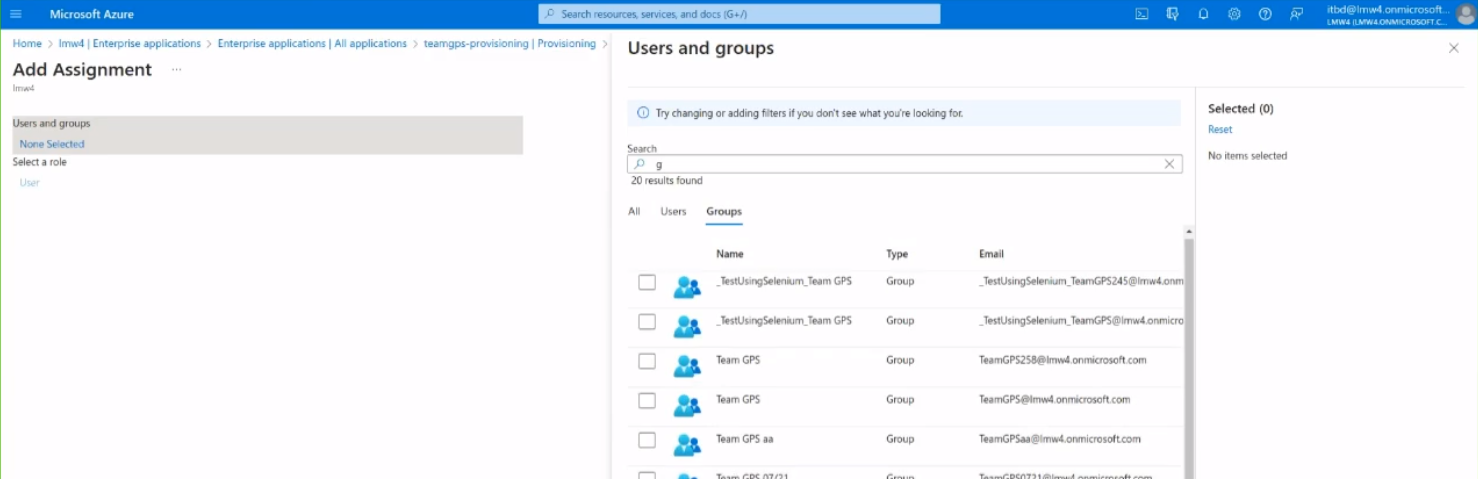
- Define the users and groups that you would like to provision to Team GPS by choosing the appropriate values in Scope in the Settings section.

- Now to add user, navigate to User and groups > Click Add user/group

- Now you can directly add someone or choose from the group > Select > Assign.
- When you're ready, go to Overview > Click Start Provisioning

This operation starts the initial sync cycle of all selected users and groups. The initial cycle takes longer to execute than subsequent sycles, which will occur approximately every 40 minutes as long as the Azure AD provisioning service is running.